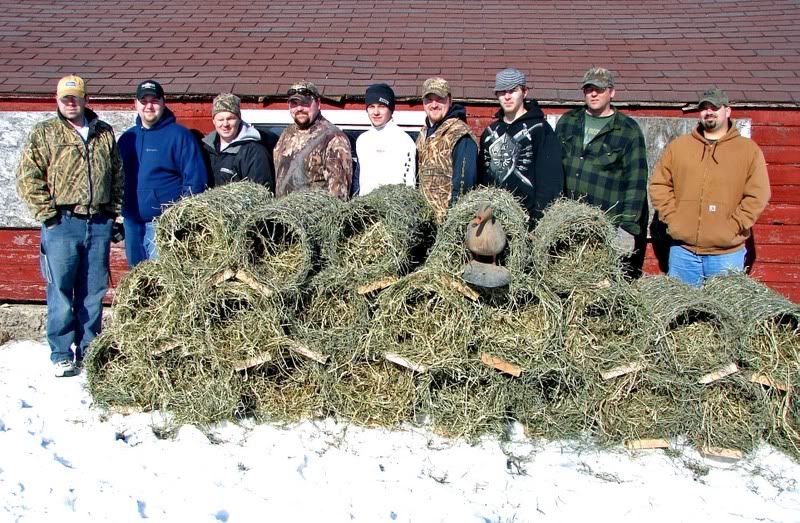
Updated 3/22
Instructions for Mallard Hen nests
These are recommendations from my experience with building and maintaining many of these structures for many years. This topic details using "old school" Delta Waterfowl design. The wire costs about 1/2 as much ($8-9 per nest) than the new school Delta Waterfowl design.
For "new school" of DWF MHN design and info, click here: https://deltawaterfowl.org/hen-houses/
The advantage of the new design is for high placement, where you swap out say 25 nests each day riding snowmachines or ATVs, reroll the nests, and replace the next day day, day after day. The 1x2 14 ga was $180 2 yrs ago for 14 nests, steel has gone up 30% since then, so likely around $16-18 a nest for wire alone. The 1x2 is used so a duck egg can't drop thru it, as remember there is no board under it(unlike the old school method where there is a board to stop it so the 2x4 mesh is used).
Hen Nests.
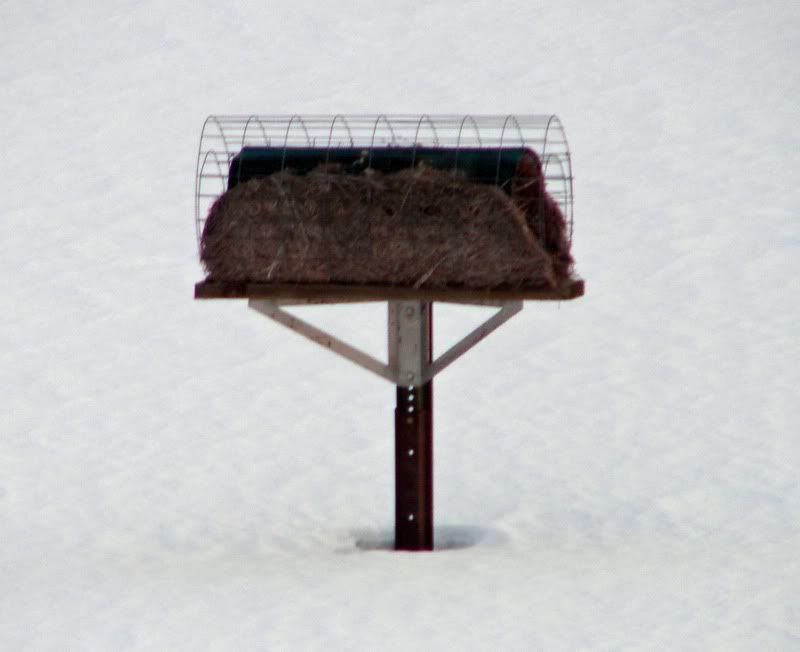
The best choice is the post method. Use a 1” i.d. used well pipe for the main post and 1.5” i.d. well pipe for the “sleeve” that slips over the 1” pipe. I can get the used pipe for free from my local well driller [He supports the ducks in this way] Check in your area for a well driller and politely approach them—often they will be very happy to help you out when you explain what you are trying to accomplish and will give you the pipe for scrap price or for free. Highway hat channels can also be used for the post too, but require a custom made side bracket. It is best if the nests are installed on ice in February and early March.
Materials for the nest.
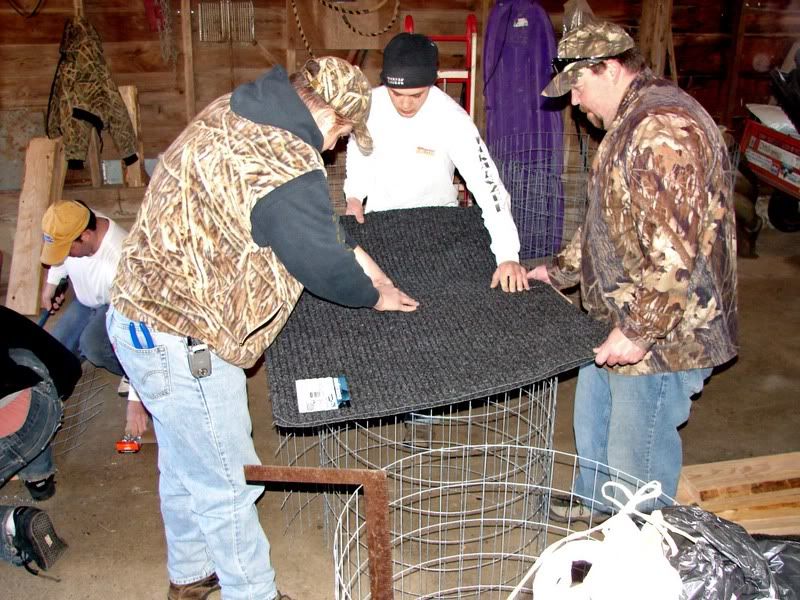
Use at least 12.5 gauge (the 14 gauge is too light) Galvanized metal wire in the 2x4 mesh. [Ducks and geese love to sit on top of the nest and the geese will crush the nest way too easily with 14 ga. wire and the 14 ga. is not nearly as durable as the 12.5 ga. is.] Buy it 72" wide in 50’ or 100’ rolls at Mills Fleet Farm (cheapest and they actually stock it), a 50’ roll makes 12 nests at 100” long for each nest. You'll get 6 -36" wide and 6 - 32" wide nests on a 50' roll. Use hay and not straw, as small grain straw (wheat, barley, etc) will blow away and is not preferred by the hens. Hay is not alfalfa either. Use upland hay, which is the natural growing taller/finer grasses, also known as buffalo grass, sweet grass, horse hay, etc.. Use soft hay for the inner bedding, not coarse hay (like Canary grass which grows in the low lying meadows), as the hens like the softer hay much better for its nest as they normally nest in the upland grasses and it simulates it. 1 bale of hay should do about 5-6 nests. For a longer lasting nest, flax straw can be used for the cylinder. In some areas it is readily available, in others, it is impossible to get. But I still use the soft hay to fill the tunnel. Use Treated wood as regular wood rots much too quickly. It is best to use a 2 x 8 plank as 1” thick splits way too easily. The 8” (7.25” nominal) width is important, it’s so the nest does not roll to the side. Cut the board no more than 3” longer than the width of your wire mesh material. This is because Crows love long boards sticking out too far for a landing area so they can predate the nest. For 36” wide wire, use a 39”x2x8 Tr. board, you will get 3 pieces from a 10’ length. 2x10 plank can also be used. 2x6 is too narrow (the nest likes to roll to the side). 1” hot dipped Galv. 9 ga. fence staples will be needed to fasten the wire to the board. (do not use 3/4" poultry staples as they will pull out after a few yrs). For the carpet layer, its purpose is a rain shield, and to darken the nest into a tunnel effect (there are some opinions that it gives a sense of security to the hen from over head avian predators). Use only outdoor or carpet runner where the water does NOT get through (rubber backed). I buy 3x4 door mats at Menard's when on sale for $9 each (reg price is $13) and cut it in ½ to 2x3’ pieces [Regular jute backed carpet rots and is not water proof.] (The 3’ long length is important so 3/4 of the top portion of the nest is covered.) Tan color is best as it is same color as hay and being neutral in color it does not absorb heat as readily as a dark color does, but may be tough to get. The entry mat carpet from Menards is dark gray.
Building the nest.
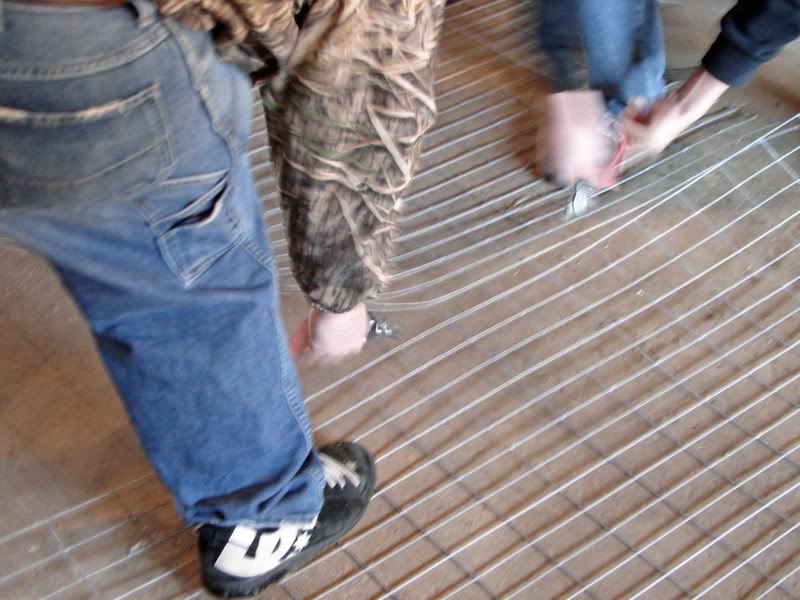
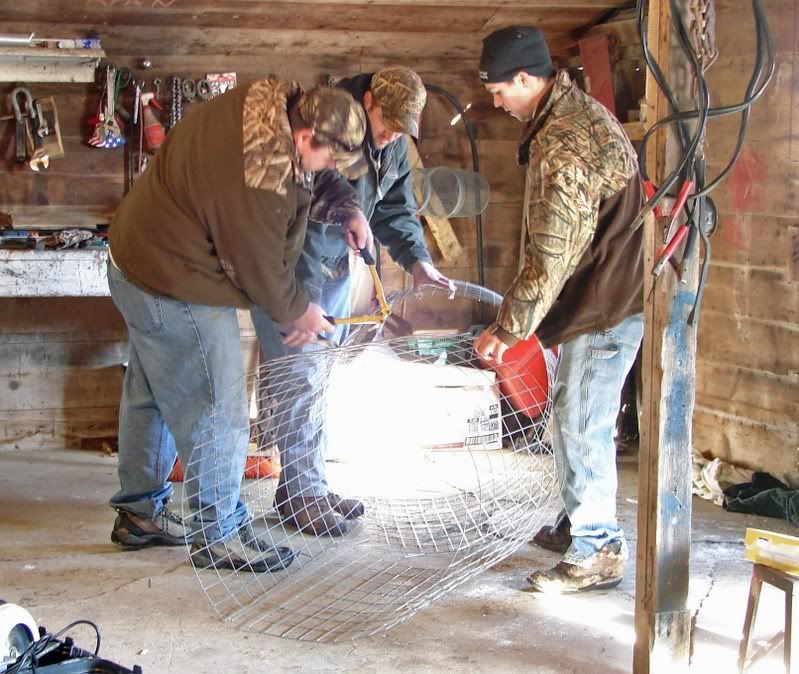
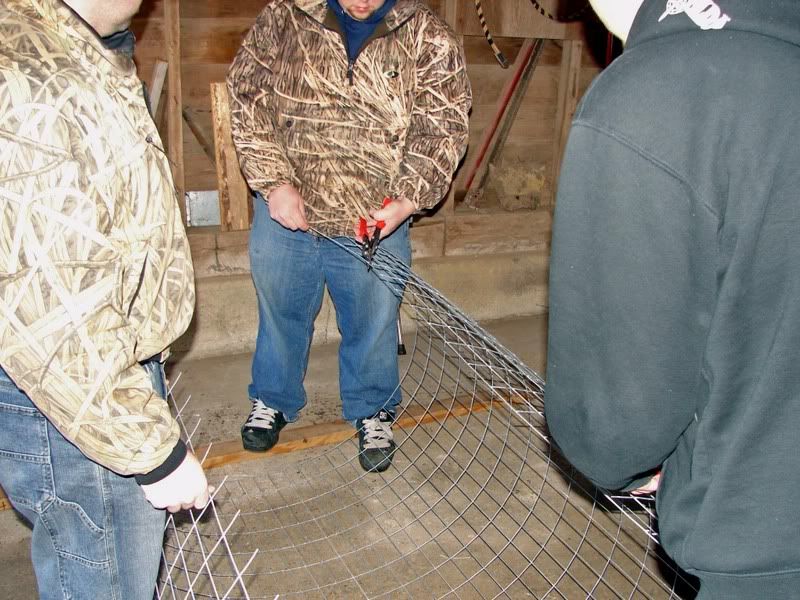
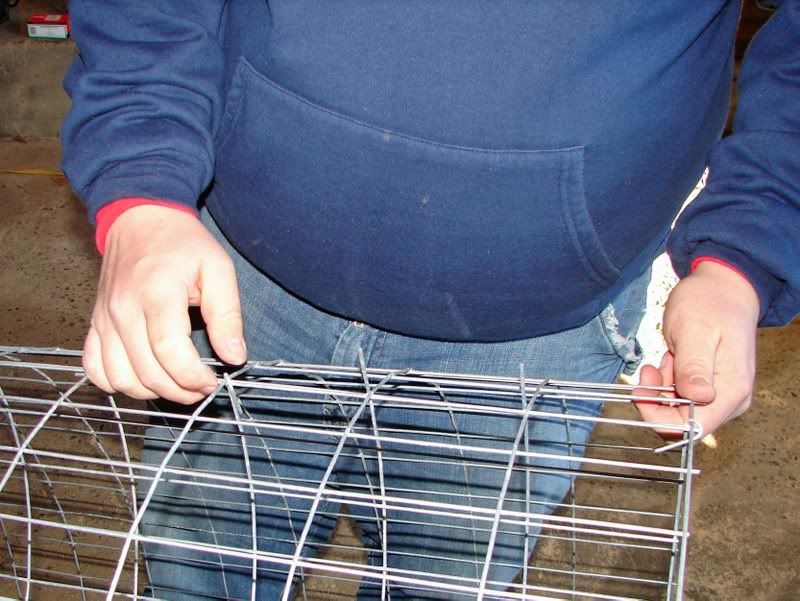
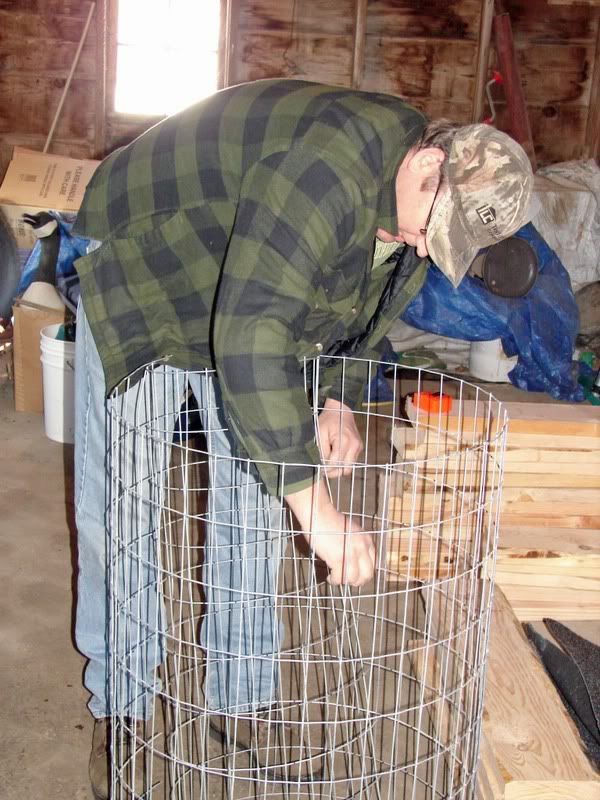
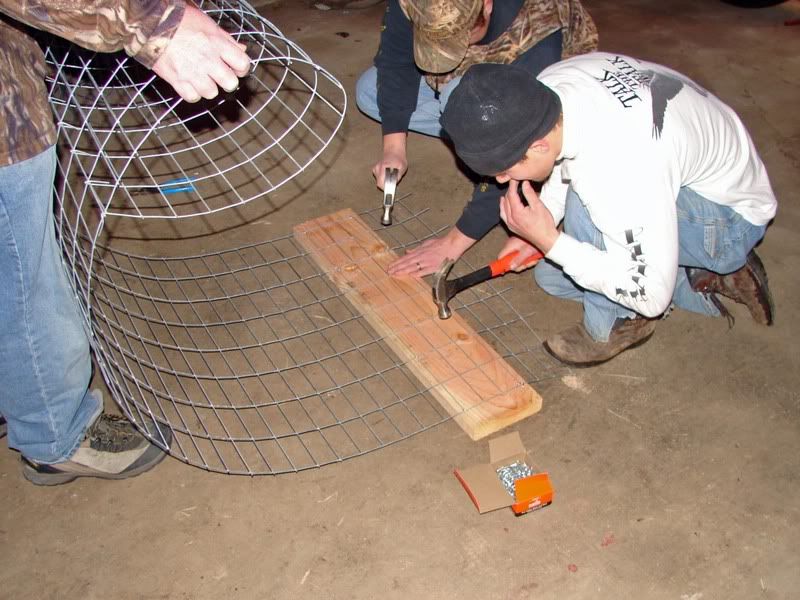
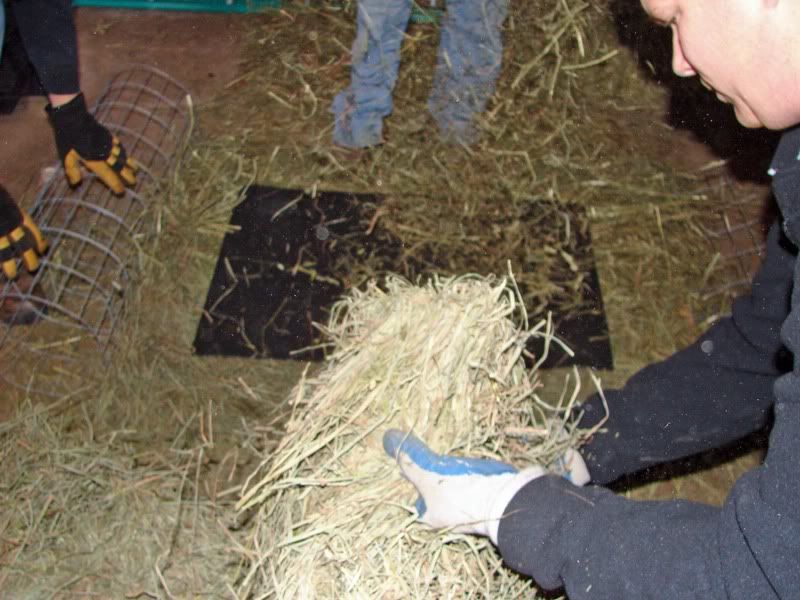
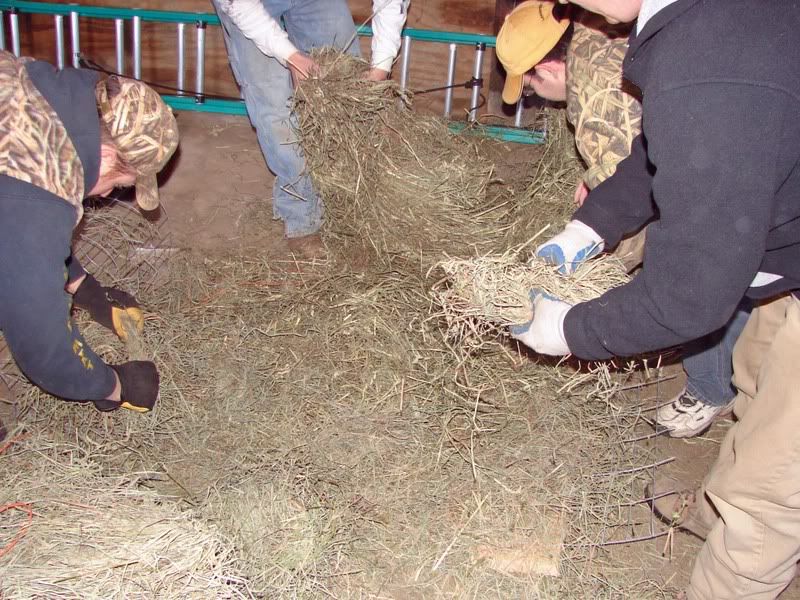
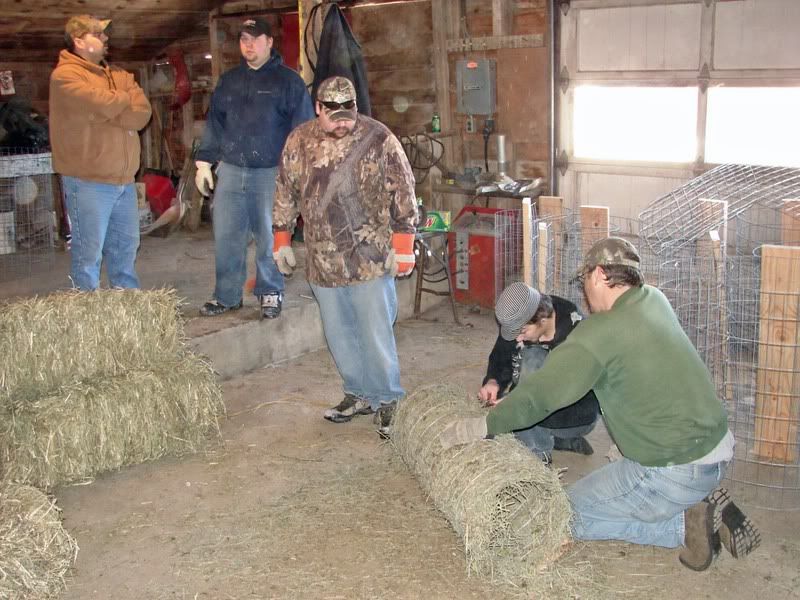
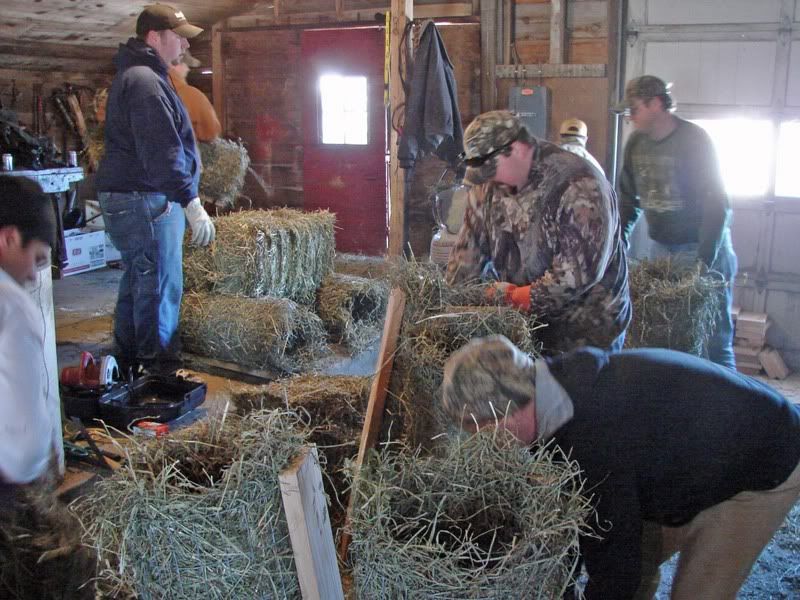
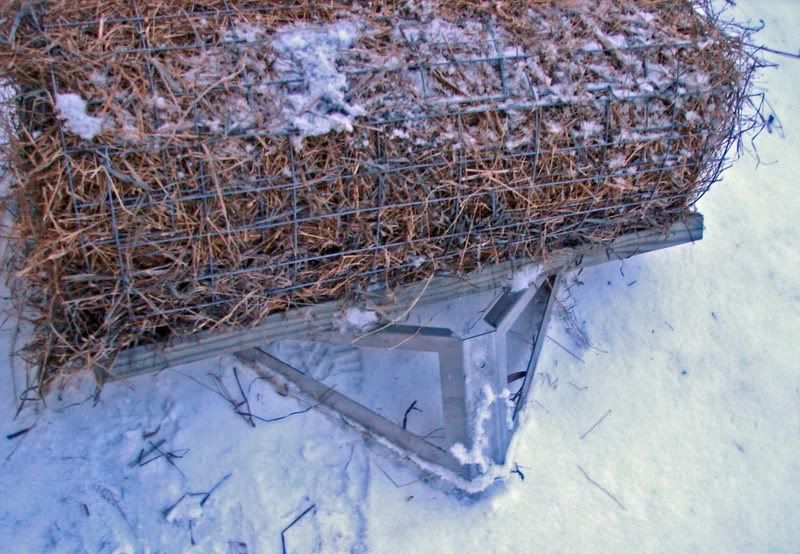
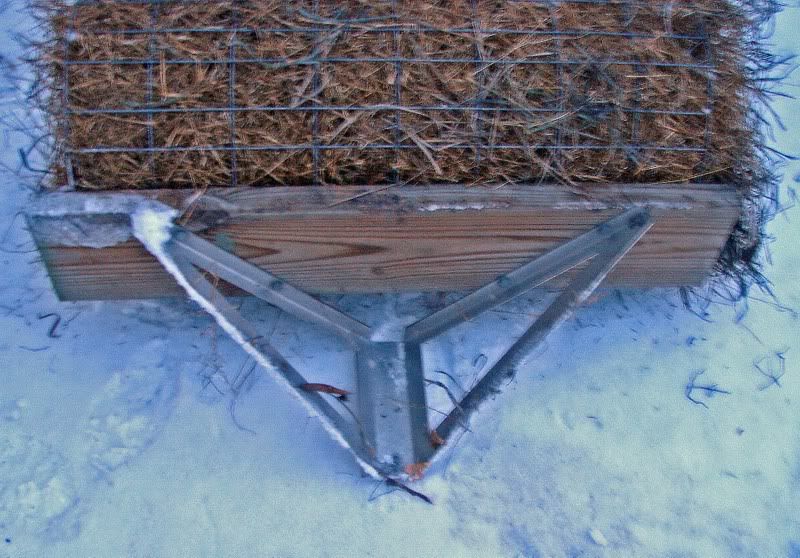
(The next post will have this info and pics with it.) It is helpful to use leather gloves and safety glasses while manipulating the wire. Cut a piece 100” long from the roll, make the cut so you have 1.5”+- long wire “tag ends” on each end (you will need to trim off 1 cross wire for long enough tags ends on both ends of 100” long piece). When you roll up the nest, make sure the long (100”) running wires are on the outside VS the inside of the cross wires( 30 to 36” long) as too often the welds will break over the years and the wires on the outside will help hold the nest together. [Sometimes this means bending the wire the opposite direction of the how it was rolled up]. Make a circle about the size of a basketball 36” in circumference + the 1.5” tag end that is then looped and hooked over. Attach all the wire tags ends all along the width to the mesh to keep the inner nest circle in place.[I bend them diagonally to cross 2 wires and bend them against it self so no wire is sticking up inside the nest] Squeeze it into a round circle. Place a 2x8 Treated plank (the board should be 2 to 3” longer than width of wire) under the wire about 8" from the very end of the wire mesh, (which is the opposite end of the inner circle) and attach the mesh with 1” Galvanized fence staples with 2 rows along each side of plank about every 8" at the crossing wires into the 2x8 treated board.
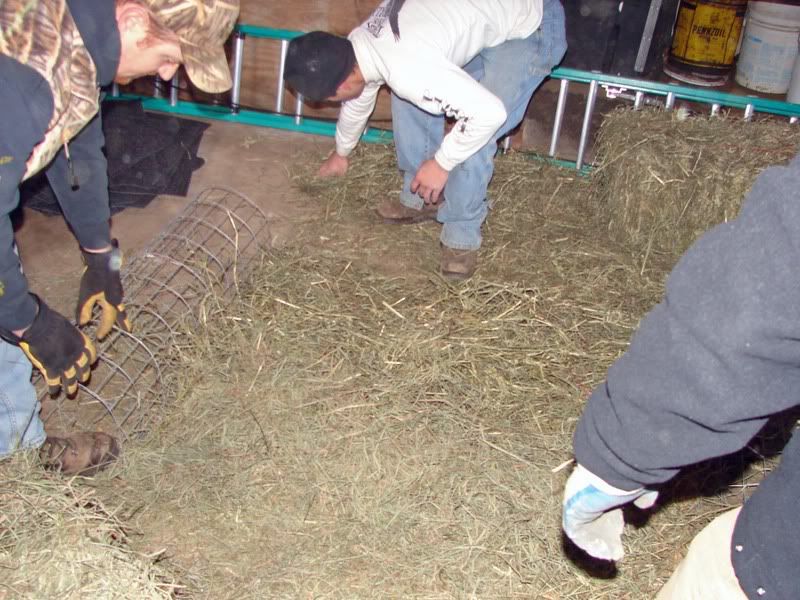
Place (shake the hay so it falls loosely) a thin layer of hay or flax straw on the wire mesh (just enough so that you can not see through it), place the carpet runner so the 36” goes the long way and the shorter width goes across. The fiber side should be faced down. Spread more hay or flax straw over the carpet to cover it up. Now tightly roll the inner mesh over the hay/carpet/hay into a full circle. The one continuous piece of wire mesh will be wrapped around 2+ full times with the hay/carpet/hay sandwiched in between the wire. The distance between the 2 wire layers should be about 2”-2.5", if it is more than that, it is too “fat” and unroll and remove the excess hay (if it is too fat—the carpet will not end at the edge of plank-but up the side instead and there will be an exposed no hay area). Bend 4 of the wires ends to hook the rolled up nest together (the use of pliers is helpful). You need to remember that the hay will need to be added to or replaced every few years, so all you have to do is unhook the 4 outer wire tag ends and you will be able to unroll the nest, add more hay or flaw straw as needed and roll it back up and rehook the wire ends. Remember to stuff the middle of the inner circle full of hay as the hens will build her nest from this hay, but allow a hollow area at each end for the hen to enter. (The hay should be stuffed fairly tight in the middle so the wind will not blow it out). So to recap you have 100” long wire mesh: 36” for inner circle, 46” for outer circle, 8” at board, and 8” beyond the board.
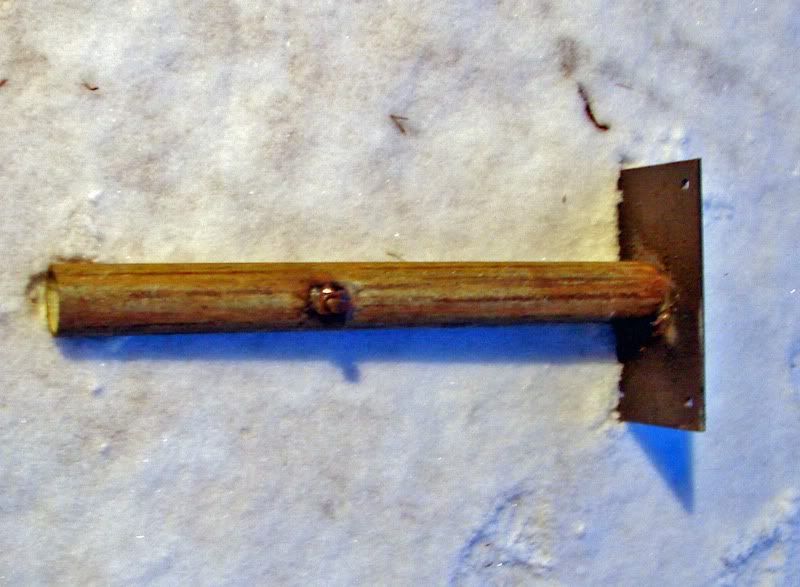
Making the pipe sleeve.
The idea is an adjustable height sleeve that slides (1/4” play) over the pipe that has been pounded into the pond/slough. Use 1.5” pipe that is 1.5’ to 3.5’ long. 6” up from 1 end drill a 7/16” hole through 1 side (the use of drill press and vice clamp is needed to keep pipe from rolling). Then take a metal grinder and grind around the hole the size of a quarter and also along the opposite end of the pipe up a ¼” around the pipe. (the galvanizing interferes with the bond when welding). Use a 3/8” x 1.5" long grade 8 bolt and nut for the next step. Insert the bolt into the nut so it sticks through at least a 3/4”. Weld the nut over the hole that was drilled. Now make up the base plates. It is 6 x 8 and 3/16” thick. Drill 4 – 11/32” holes in about 1” from the corners. Now weld on the pipe to the base plate. Just attach the metal plate to the 2x8 with 1” x 5/16” galv lag bolts. When tightening the set bolt, make sure that the nest can not spin in the wind. Also you tighten it enough to “dimple” the 1” pipe if you need to lift the sleeve up higher the 1" pipe to get it 3-4" off the ice. The dimple means you have pushed in enough with the bolt so it can not slip down, but not so tight that it distorts the 1” pipe and you can not lift off the sleeve at a later date if needed.
Picture is of an 18" long sleeve
Please see this link for more bracket designs: viewtopic.php?f=13&t=1610
Where to place Nests
Generally smaller shallow water areas are best. Smaller meaning from 100’ pothole to a small slough. Lakes are not good as less usage by the hens and ice flows. They like nearby cover (like Cattail reeds) and the shallow water is where the macro invertebrates are located which the ducklings and she will feed on in the summer before they can fly. Also ice is a consideration, as ice can push a pole over, especially on lakes or bigger sloughs. So choose small narrow open water fingers that go up a finger bay, smaller sloughs <10 acres, or small potholes/ponds <1 acre. Shallow depths (under 6’) seem best. Often even small sized waters the ice can push a pole over (the ice melts around the perimeter, but 1' of ice in middle yet, and the wind pushes the ice, and then the pole. So often the North side (sun melts this side first) about 10' from the rushes is often used as less ice action. Do not place the nest in the reeds, for whatever reason, the usage is a lot less than when compared to placed in open water. And creeks/smaller river are asked about, but due to fluctuating water levels (floods) these nest should not be used in them, but instead placed nearby on back waters and pot holes, sloughs. Also regarding rivers/creeks, debris floating with the current pushes over the poles even if no flood. Thus it is best no to place MHNs there.
In agricultural areas where there is row crop around the pothole or small slough, will get the highest long term usage as there is no where else to nest. but if they have plenty of grasslands to nest at adjacent, there will indeed be a lower use of a MHN, as they naturally will do as their instincts tell them to do- nest in the grasslands.
On new nests, it seems at about 4 yrs out the % of usage levels out.
Installing the main pipe.
The goal is to have the nest at 3 to 4’ up off the water height on a normal (Vs wet or drought) year at ice out. Once a spot has been chosen, you’ll need to check the water depth and softness of the bottom. Well pipe come in 21’ lengths, often I cut it so I have a 2 lengths. A 9 and 12’, or a 10 and 11, and sometimes an 8 and 13' lengths. I always have extra various lengths with. Sometimes though I have used an entire 21’ length as the bottom was so soft. Thus a bit of trial and error is needed to determine to actual length that you need. For example, a clay or sand bottom, with 3’ of average water height, you would pound the pipe in 2’, plus 3’ for out of water, and so 8’ would be needed. A softer bottom maybe 10 or 12’ length is needed. If you find you have a length that is too high, use a cordless Sawzall or a metal cutting cordless grinder with 1/16" blade or similar to trim the height. If the pipe only sticks up 1’ out of the water, use a 3’ sleeve to add the additional height that you need. I often place the main pipe at 3’ up off the ordinary water weight. If a drought it’ll be 4’ or 5' up, and if wet weather pattern (high water) I can use a 3.5’ sleeve and still be 2.5’ up off the water. Thus the sleeve gives you adjust-ability as well as portability too.
Maintenance.
For best results, the nests should be maintained yearly, about 1 or 2 months before nesting season. Often you can add hay/flax to the top outer layer using a piece of wood lath by pushing tufts of hay/flax under the wire, usually on top. (The hay due to gravity slips to the sides during the course of a year). Also take out the old bedding is wet and replace with new soft finer bladed hay for the new nest. If there was no duck nest, use the hay in the inside the tunnel to stuff the outer layer, and add fresh hay inside the tunnel. But every few yeara you need to unroll the nest and add hay. (with flax it can be 5 yrs as it does not rot nearly as fast as hay does) Often you can reuse the inner hay on the outside, and add fresh hay to the inside of the carpet and tunnel. (Obviously, do not reuse rotted hay) This is best done in February when there is solid ice. This is also a great month to install new nests. If you live in an ice free area, then you’ll need to use a boat or waders. If using a boat, there will need to be at least 2 guys, if not 3. One to work on nest, another to hold boat in place and counter balance the boat (2 guys holding the boat is place is much easier-especially if not a calm wind). In this situation (open water) a good way is to fully add new hay is to loosen the bolt, and lift off the old nest from the pipe, and then install a new nest. Do the adding of hay on land as it is much easier. I suggest pounding in a 4’ x 1” pipe 2’ into the ground, and drop the old nest over it and then do the maintenance at your shop/garage area. (One guy welded a 2’ piece to a tire rim, and filled the tire with concrete so it is portable, and yet stable). Often guys will make up 2 to 6 additional nests to exchange out with the old ones. Go back to shop and do the maintenance, and keep replacing as you go. Often the extra nests the guys just add to a new area each year. It is a great way for a bunch of like minded conservationists to do a hands on project in your area. But even 1 guy can build and maintain nests, as I maintain over 50 nests myself.
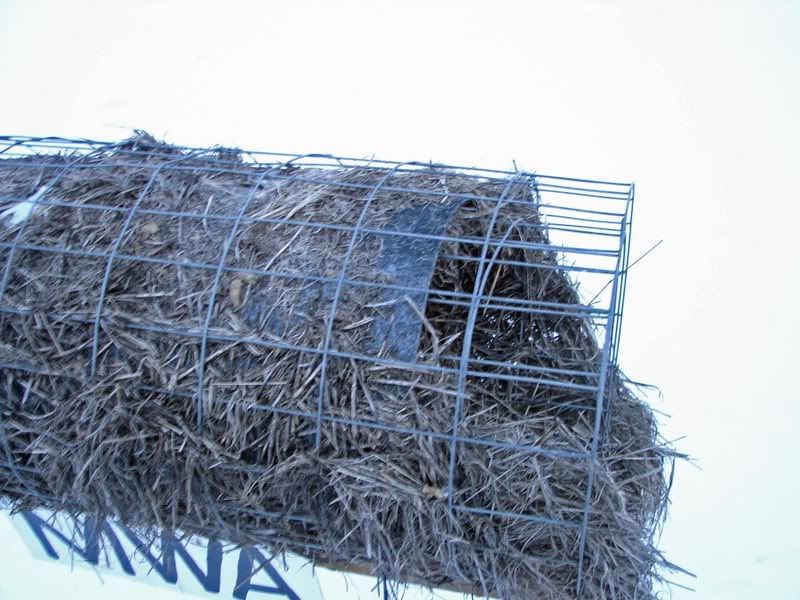
Pictures is of 2 year old nest that was not top stuffed with hay 1 year ago. [It is on a 21' pipe (very soft bottom) with an 4' extension (bottom 1' of sleeve is down in the ice)]
This one should be unrolled and rehayed after 2 years of exposure, at a minimum end stuffed with hay or flax
This is nest is 3 years worth of wear with no maintenance, thus bare carpet. It definitely needs to be rerolled and rehayed.
It happens to be mounted on a highway hat channel with custom made bracket.
Making a bracket when using a highway hat channels for posts.
Basically you will need to fabricate a bracket to support the nest. It will need to strutting “arms” to go out from the channel. And will need 2 holes that go up against the channel to bolt it to the channel. These arms will need to be at least 20” long. Think of an upside down roof truss with a king post. The top 2 arms are made of 1.5” angle iron in which are 2 holes drilled (11/32”) in each arm to secure the nest to. I suggest also using ¾“ angle iron for struts that brace it so the arms do not bend. Then you’ll need a 4” x 10” x 3/16" thick base plate to which 2 - 11/32” holes in which 2- 5/16” bolts will hold the nest to the channel. You would weld the top arms at an approximate 30 degree angle to the nest and then weld the 2 smaller angle iron braces to the bottom edge of the base plate. Keep in mind that you’ll need about 6” of clearance from the edge of the 2x8 plank to the base plate/channel because the diameter of the nest is about 20” across. You can splice the hat channels for additional height. (14’ is about max length when 2 - 8’ pieces are used). They make the top channel to fit inside the lower piece that goes into the ground. The highway hat channels are pricey to buy new. But if you ask the county highway dept, they often will be exchanging the old rusty sign posts out for new ones over the course of the year. Often you can obtain the old rusty ones for scrap price or sometimes they’ll even give them to you when you explain what you are doing with them. [A good idea is to place a couple of nests near the city/cty/state Highway dept. where you got them from if possible, as they will indeed remember you as they get to see the ducks using them.
Picture of bracket with the offset mounted on new nest. Notice difference in hay when compared to above pictures.
Reverse side of bracket. FYI, this nest is made from flaw straw
FYI, the above pictures is of a custom stainless steel brackets I had made up a 20 years ago. They used a laser to cut it out of sheets and an industrial break to make the bends. I had exchanged a day of labor on a friends house, and he spent a Saturday at his work to write the computer program and do the cutting and bending. It would have cost over $25 a piece if contracted out back then it'd be well over $40 now. And that was before the big price hikes in metal the last 2 years. But it should like you a good basis on the principle on making up a bracket for a nest when using highway hat channels for posts.
Here is something that I have been experimenting with and has proven to be effective so less posts are used. It is combo of a MHN and a Woodie Box mounted on the same Highway hat channel post. There is no predator guard under it as it is away from the shoreline far enough and in over at least 2' of water. This way you have 1 pole with 2 nests, and no predator guard ($20 each), so more cost effective.
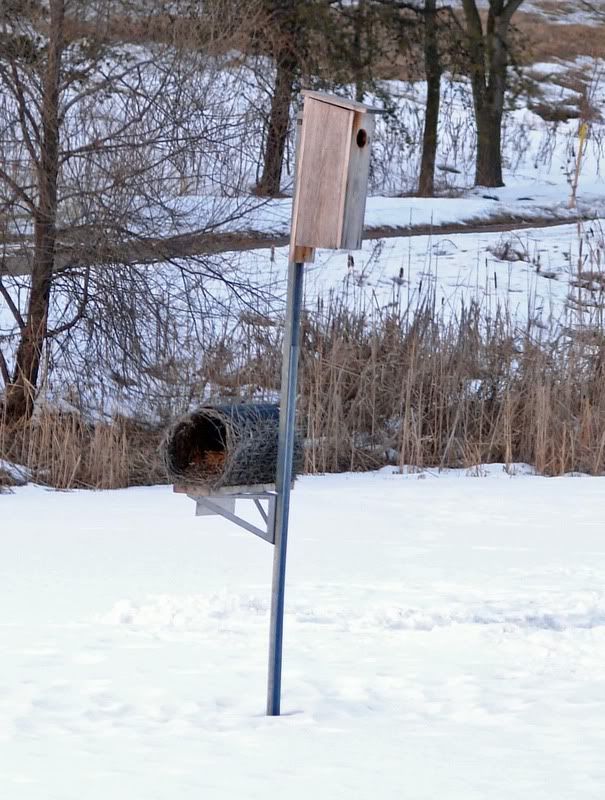
On others I have a cone shaped sheet metal predator guard under it when on land (Woodie box only) or close to shore or in the cattails.
Here is what you are looking for after a successful hatch. A typical Mallard hen nest that she built inside the nesting tube. Notice the membranes. The membranes is what you count to get a good indication of how many ducklings hatched. Many membranes and shells are buried in the down. If I remember right, this nest had 11 or 12.

In conclusion, it is far better to do it the right way the first time. I hope this helps to guide you in helping the Mallards.
If all this sounds like a lot of work--it is! But do it for the ducks! It is one of the ways you can give back to them since you hunt them too. And watching them hatch is a bonus event in the off season.